Publishing an eBook through Amazon’s Kindle Store, which is the number one publishing platform for digital books / eBooks, is indeed a privilege for self-publishers to get known to millions of readers across the world.
Amazon Kindle Store, the top leading self-publishing platform offers service through its Kindle Direct Publishing (KDP), which is easy and fast. The first step is to go to the Kindle Direct Publishing site and sign in to an Amazon account. This account offers a Kindle Bookshelf wherein books to be published should be added. The Bookshelf will display the status as ‘Live’, if the books are published and ready to be accessed by readers, for purchase. The status is displayed as, ‘Publishing,’ if the books are under review and will be published shortly to the Kindle store.
Adding an eBook to the Kindle Bookshelf:
The process may be explained through screenshots. To add a new book to the Bookshelf, should click on the option, “Add a new title,” found at the top corner at the left side of the page, which will take to the publishing page, as shown in screenshot 1, below:

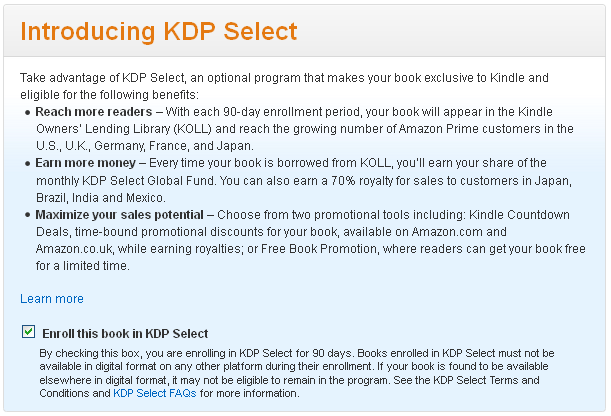
Now, it is required to enter details about the book to be added, on this page. To start with, the publisher will have to confirm whether he/she would like to enroll his/her book in KDP Select which is an agreement that lists the published books on Amazon for a period of 90 days. If the publisher accepts this agreement, the publisher will be placed in the Kindle Owner’s Lending Library from where the Amazon Prime’s members are allowed to borrow the book without making any payment. The publisher will be paid for each of such borrows. The publisher is allowed to list his/her book for free for 5 days during this 90 day period apart from being able to earn a royalty of 70% on books in the markets in a list of ‘Available Sales Territories,’ which you can find in: https://kdp.amazon.com/help?topicId=A29FL26OKE7R7B. So, to get enrolled in KDP Select for 90 days, the box at the top of the page with the header, ‘Introducing KDP Select’ needs to be looked into, in which details of the book – the book title as well as the series title, author, description of the book, etc., will have to be entered (Refer to Screenshots 2 and 3 below).
To fill the online form, the book name (New title) is to be entered at first and then the sub-title (optional), edition number (optional), publisher’s name, if applicable – if the books are published under any publishing company’s name (this is also optional). It is required for the publisher to narrate his / her book’s title in such a way to advertise the same to be marketed in the box provided under the header ‘Description,’ as shown in Screenshot 3.
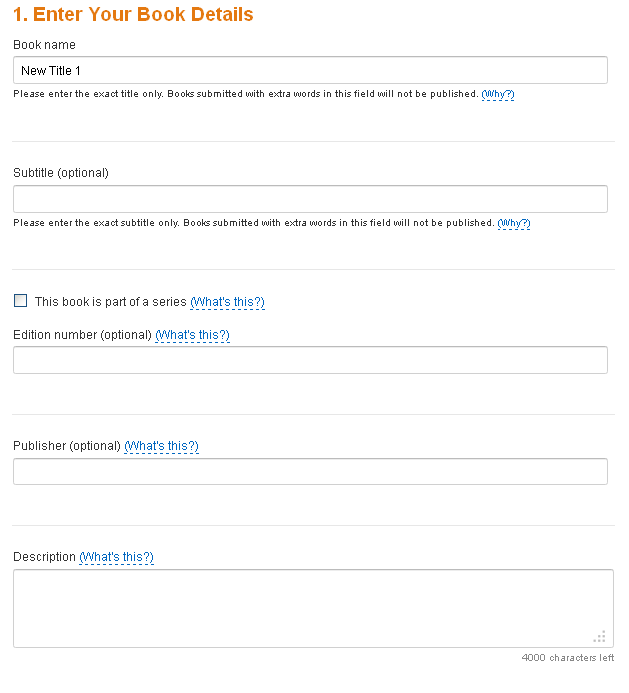
If the book is part of a series and if so, it is to be indicated in the relevant box. It is also necessary to mention the title of the series in the box under the header, ‘Volume,’ as shown in screenshot 4 below:

Amazon displays the series name (if any), along with the book title within brackets (parenthesis) and it is suggested that the publisher also mention the number of books in the series next to the series title, which could enable the readers to identify their choice of the book quickly. Publishers may also suggest options regarding the appearance of their titles in searches.
The option of Edition Number may be used especially for non-fiction books which require updating with additional contents and also in cases where grammatical or format or content changes are made to fiction books too, where the edition number could be changed as second, third, and so on, for every new upload.
Then listed is the ‘Description Box,’ wherein the publisher is allowed to use four thousand characters to narrate his / her book. This is the best option which the publisher could make better use of to put his book in a nutshell, with a nice presentation that could urge the readers to read the book. Successfully experienced publisher authors may also use cover quotes from other authors, within this description about their books to draw the attention of the readers. For example, “Power Angels moved me to the seat edge. Don’t miss reading it!” – R.J. Ross.
Next is the ”Add Contributors” option, which should be clicked to add a list of contributors to the book, which allows entering the author’s name as well as any other names required to be included.

The name of the author is to be added first in the pop-up box that asks to enter the names of the contributors. Authors may use pen names for their books and only this name will appear on the book as Author’s name. The drop-down box may be used to give a title to the person whom the author would like to acknowledge. It is required to click ‘save’ after updating the list of contributors.
The further boxes that are self-explanatory type are mostly optional. The fill-in columns include mentioning of language in which the book is written and the required publication date. The next fill-in box is, ISBN number, again, which is optional as Amazon does not claim self-publishers to buy ISBN for ebooks. It is also to be noted that if it is preferred to mention ISBN, it is not possible to use the ISBN of the printed version of the book for the eBook. Unique ISBNs are needed for each of the eBooks. An option is also provided regarding the purchase of an ISBN, under the header, “What’s this?”
The second part to be updated is: Verify Your Publishing Rights. Here, the author can indicate that his/her book is part of the public domain. Otherwise, the author may mention that the book is not part of a public domain and that he/she holds all required publishing rights. Screenshot 6 below may be referred to in this regard:

The next step is the ‘Target Your Book to Customers’ section, which is the main section of the publishing process in Amazon. Categories and keywords are listed which could be selected by the authors to make their book easily accessible at the Kindle store. This could be done by clicking the “Add categories” to make the selections. Only two categories are allowed and to change any category, one should remove the category by clicking the same and then selecting the ‘Remove Category’, only after which the new category could be selected. However, the categories are changeable at any time.
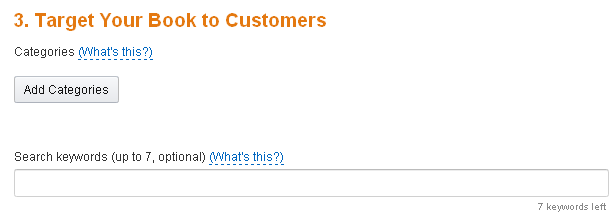 The selection of keywords option to get books listed in the search engine is given as optional but it is suggested to make use of this option to enable the readers to get the book easily through searches.
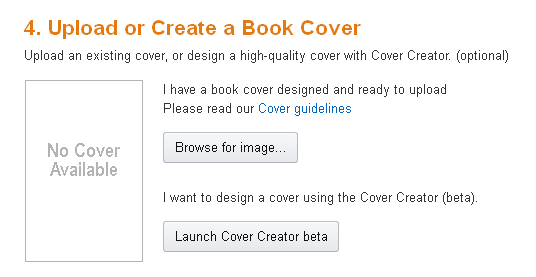
Upload of the book cover is the next part which should be done under the section, ‘Upload Your Book Cover.’ The image to be used as a book cover needs to be uploaded here. The KDP site provides guidelines regarding choosing the image size for the book cover, which could be availed by clicking on the ‘Cover Guidelines.’ The cover that is ready to be used should be uploaded by clicking the ‘Browse for Image’ option and thus moving the image to the ‘Product Image Upload box.’
Alternatively, you may avail of the ‘Cover Creator’ option provided and design a cover. To do this, you should click on the ‘Launch Cover Creator beta’ button, as shown in screenshot 7 below:
The most important thing to be noted is to provide the eBook in .MOBI format instead of a .DOC format to avoid the format of the book from getting affected.
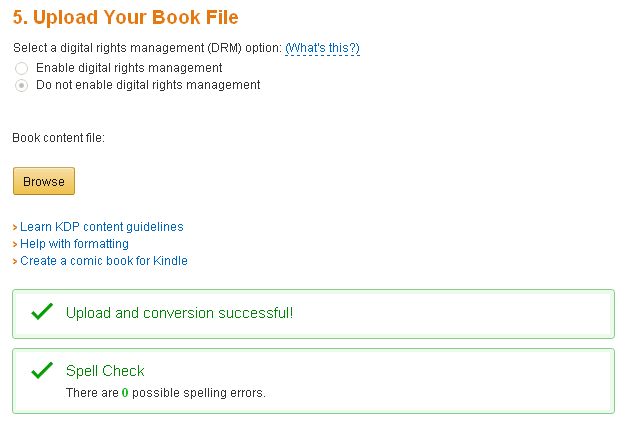
It is necessary to wait until the upload process gets over successfully with the message displayed, “upload and conversion successful” as shown in screenshot 8 below:
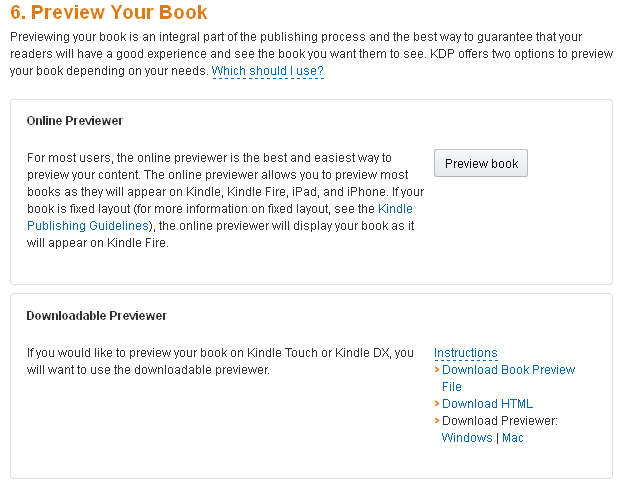
To preview your eBook, you may use any of the two preview options: ‘Online Previewer’ or ‘Downloadable Previewer.’
However, the ‘Online Previewer’ is the suggested option that is easy and best. The Online Previewer could be used as per the instructions below:
The way the book will appear could be viewed through the ‘Preview book’ option, via a small window that will pop up and impersonate the Kindle device. It is required to save each page before proceeding to the next page by clicking the option “Save and continue.” The book may be saved as a Draft at any stage and appear as a Draft on the bookshelf.
Please refer to screenshot 9 below:
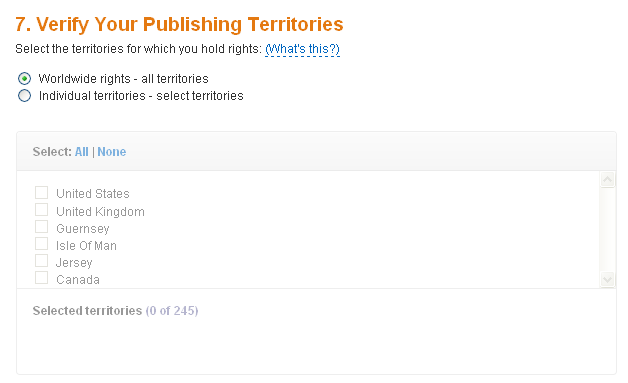
The next part is: Verify Your Publishing Territories section, where the author could mention the territories where he/she has the right to publish his/her book. To have the right to publish the book throughout the world, the author should choose, ‘Worldwide rights’. By doing so, Amazon could sell the book to anybody globally, through their site. Look into screenshot 10 below:
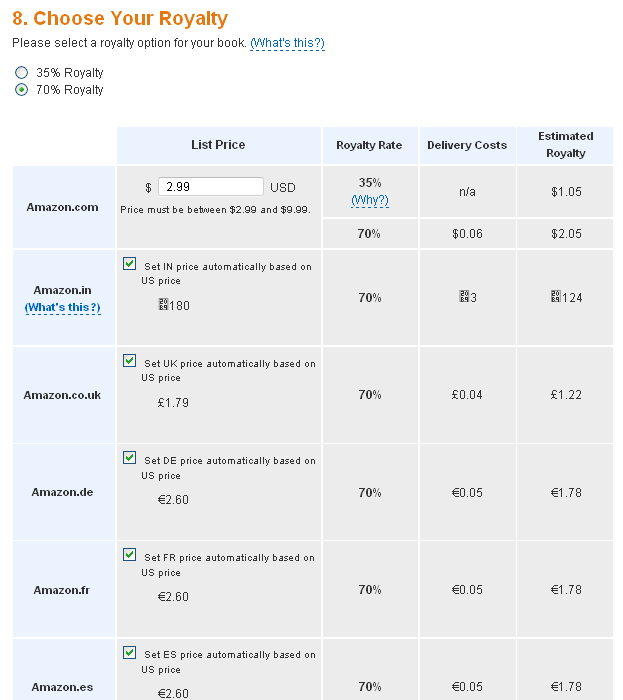
‘Choose Your Royalty’ is the next part of the self-publishing process with Amazon. 35% and 75% are the two royalty rates offered by Amazon. However, the royalty rate of 70% is available only for those books whose price ranges from $2.99 and $9.99. Other price ranges are offered only 35% royalty. It is also to be noted that no eBook could be priced less than $0.99. Therefore, it is important for the authors to choose the correct royalty rate for their books.
After the royalty rate is selected as applicable, authors should enter their list price. Information regarding the delivery cost charged by Amazon for the book and the estimated royalty that the author would earn for each of the books sold will be provided next to the list price. There is also an option to set price – the authors may enter their own price or choose the option, ‘Set price automatically based on US price’, which would automatically update the price as needed.
The final part is the ‘Kindle Book Lending’ section. This is an option that could enable any person who has purchased the book of an author from Amazon, to lend their copy to another person for a fortnight. You may refer to screenshot 11 below:
When all the above processes are done, the user should click the ‘Save and publish’ option. Doing so, the book will add up to the queue for review and the status on the Amazon KDP bookshelf will display as ‘publishing’. Thereafter, when the book is ready for sale in the Kindle store, the status will be displayed as “Live”.

The KDP bookshelf allows the authors to edit, change or even delete a book. These options are displayed when the tab next to the Status bar in the bookshelf with the header ‘Actions’ is clicked.
The details of sales could be checked once the book is available as “Live,” by clicking “Reports” seen at the top and by selecting the ‘Month-to-Date Unit Sales’.

2 Comments. Leave new
[…] of extensions including KPF, MOBI, or AZK. Users can also upload their files directly to the Amazon Kindle store. Readers or consumers may access these files from their tablets, smartphones, computers, and […]
[…] of extensions including KPF, MOBI, or AZK. Users can also upload their files directly to the Amazon Kindle store. Readers or consumers may access these files from their tablets, smartphones, computers, and […]